
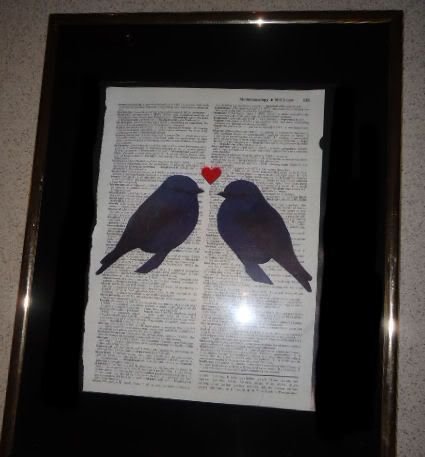
Okay so, it's not my best....for 3 reasons. 1- I did it in like 10 minutes and 2 I couldn't find my darn black sharpie so I had to use navy blue and 3 I could only find a hideous frame to use in my example. Considering those 2 reasons it's not too shabby. I plan on doing a really nice one of a bulldog because I can't get enough of my big lug of a bulldog that I feel the need to decorate my house with bulldog inspired art. Of course I have to make it vintage looking to match everything else. I will post it once it's finished.
How to create this you ask? I'll tell you how I did it.
To create:
First get a dictionary or an old newspaper. (I chose an outdated dictionary)
Next, you have 2 options.
Option 1- You can print the image onto the page itself. If you choose to do this try to find a picture that has a transparent background., or else the picture will print out with the colored background taking away from the vintage look. You can search transparent background images in any search engine. If you use photoshop you can just make make the image of your choice transparent. I like the black out look. The color is pretty but if there is color I prefer little bursts. The second option would probably be best if you like the black out look as well. Again, if you are familiar with photoshop you can make the image all black.
To create:
First get a dictionary or an old newspaper. (I chose an outdated dictionary), glue (preferably scrapbook glue) and scissors.
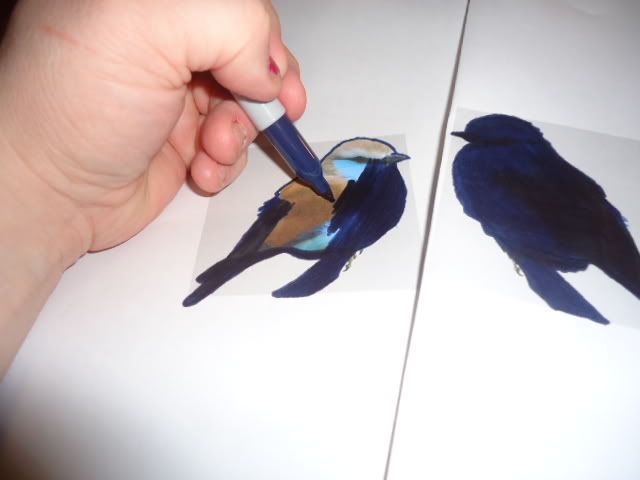
You simply print the picture out, color it with a black marker (or color of your choice). Make sure you color the picture a few times to get out any streaks. Then you cut the image out and paste it onto the piece of paper of your choice. Here are example pics:
This is the pic I chose to color. (I'm obsessed with birds)

I mirrored the image so I could place 2 images on my paper. Don't worry about how perfect you color because you are going to cut it out.
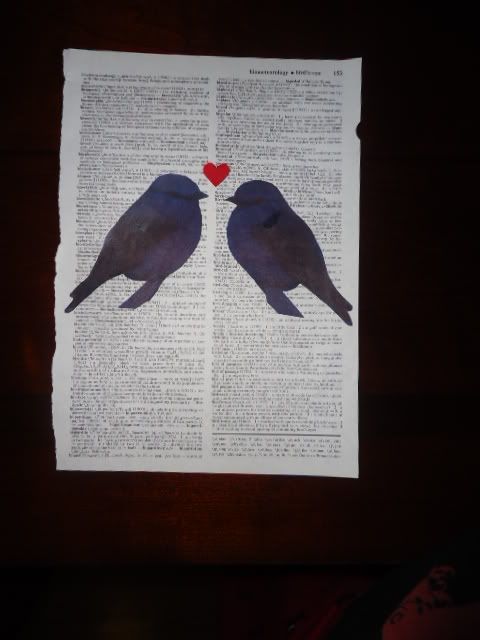
Cut out the pictures and paste the pictures on the vintage styled paper. I also added a little heart for that burst of color.
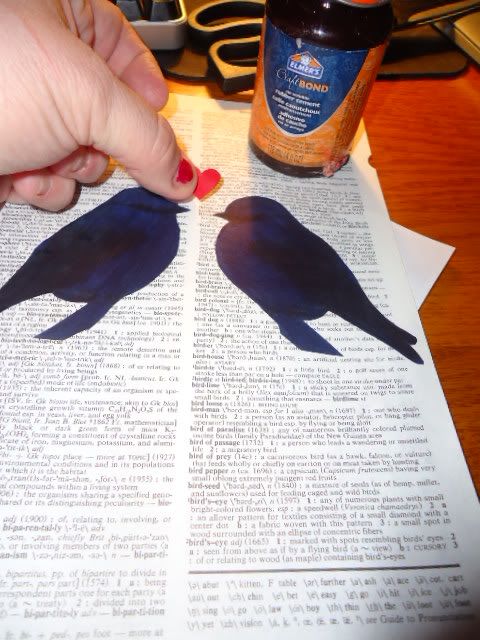
I chose the dictionary page that had "Bird" on it, just for the heck of it. I would have been happier with it if I had used black on the birds but it's still cute.
Using this option you can print the image directly onto the paper of choice. When printing, I personally like the picture in the center of the page. You have that option when clicking print. You might want to do a test try with the printing so you know where on the page it will print out.
If you try this tutorial, leave me some feedback and let me know how it came out or send some pics over. I would love to see what you create!


No comments:
Post a Comment